
Monday, December 12, 2011
MY ONLY EXCUSE
I'm such a dunce sometimes!!! LOL I was SO organised I had stitched etc everything for the #4 Pretty Posies BOM and when I prepared this last post I thought I had to stitch-up another one!!! So......#5 has become #4 if you can understand what I mean? Don't go into a panic thinking you didn't get #4....I will turn it into the one for February post. Goodness this all sounds silly but, hopefully you understand what I mean. Ü Maybe I need a break over the Christmas season?

Sunday, December 11, 2011
CHRISTMAS GREETINGS
Greetings to all and Cath and I wish everyone a safe and happy Christmas 2011. It's an understatement to say that the year has passed by so quickly! I'm sure all of us think that and wonder just where the days have gone. We've got a surprise for a lucky follower for this post....all you have to do is leave a comment by the 18th December and we will put everyone's name in a hat and draw the lucky winner!!! Be in it to win it! Ü We will have all new showcases for January so guess what we're doing over the Christmas "break"?
We have the usual offer of patterns from both of us along with the fifth block in the Pretty Posies BOM.
Cath's pattern showcase are a mixture of bags and teddies so have a look......


E pattern $7


Cherry Fudge...quick and easy and works in any fabric choice..just match the trim and buckle to suit!
Epattern $7
Hard Copy $10.00 plus postage

Retro Kitchen ....I used fabric from the Kaaffe Fasset range but any choice would suit.
Epattern $7 Hard Copy $10.00 plus postage

Elegance.......Almost has a Christmas feel with the poinsettias but, once again, suits any fabric choice. Instructions for the felt flower are included.
Epattern $7 Hard Copy $10.00 plus postage

Angels on High is the special for this post....easy little angels to make , join together with buttons and have a very special Christmas swag.
Epattern only $5.00
Now for the Pretty Posies BOM number 5 block...


We have the usual offer of patterns from both of us along with the fifth block in the Pretty Posies BOM.
Cath's pattern showcase are a mixture of bags and teddies so have a look......

A cute and easy bag to make. Teddy and flowers stitchery on the front.
E pattern $7
Hard copy $10 + postage.

Another cute Raggedy pattern. This one is for a Raggedy bag which has 4 cute Raggedy faces embellishing the front and the back.
E pattern $7
Hard copy $10 + postage.

Two small but very cute Teddies. Easy to make. Full instructions to make the twisted pin wheel block are included in this pattern.
E pattern $7
Hard copy $10 + postage.
This little cutie is my pattern that is on special this post.

I have more of the wool that I have used for this little cutie's hair....... $2 for a small bundle that will be enough for her hair. She is a very cute little doll and is easy to make. The pattern also has the instructions to paint her face and make her little kitty.
E pattern only............. $5
Jan's showcase also features two bags (we must be in a "baggy" mood!) and a funky new apron using some "wild" fabrics.

Cherry Fudge...quick and easy and works in any fabric choice..just match the trim and buckle to suit!
Epattern $7
Hard Copy $10.00 plus postage


Don't forget to leave us a comment to be in the lucky draw for the surprise and make sure you ALL have a happy and safe Christmas and a bright New Year. Best Wishes from Jan & Kath.

OOps! Cath must think we're still in 2010! LOL Maybe it's a secret wish to regain the year because it went so fast. Do you think? Ü
Thursday, November 17, 2011
SORRY SORRY SORRY!!
Sorry everyone....we've both had such a busy time we haven't been able to write our post, BUT........we will have a surprise for you soon!
Until then, keep up your stitching, Cheers,

Until then, keep up your stitching, Cheers,

Friday, October 21, 2011
I FORGOT!!!!
I'm so sorry to all those following Cath's Teddy BOM!!!! We've both only realised now that I didn't upload it etc. Here it is now......

"Here we have the third block in the Teddy Swag. Please e mail if you would like the stitchery pattern and the instructions......."
Apologies to you all again! Happy Stitching,


"Here we have the third block in the Teddy Swag. Please e mail if you would like the stitchery pattern and the instructions......."
Apologies to you all again! Happy Stitching,

Monday, October 17, 2011
OCTOBER ALREADY!!!
Can you believe it's not long until Christmas? I'm not sure where the year has gone and just hope I've been productive! This month we're featuring Bronwyn Hayes as our Guest Crafter along with showcasing our usual designs (something different from Cath this month) and a free tutorial on face painting from Cath as well.
Those of you who know Bronwyn's work will be interested in a little more insight into her life. She's been very kind and given us a lovely Christmas stitchery as well!!! Here is Bronwyn's story.

One of my favourite stitches is Satin Stitch. I do like putting satin stitch in designs as it makes the embroidery stand out and be noticed. And it's such an easy stitch to do!


Cath is showcasing her graphics this post.
 #1
#1
 #2
#2
 #3
#3
These printables will be e mailed to you. They will be clean... which means my company name will not be across the picture. I have drawn and designed these printables and they are $3 each. Just remember to say which one you would like when buying... 1 2 or 3....... Or buy all three for $7.........

Now for Cath's face painting tutorial......


Christmas Tree Hangers......Cute little stitcheries stitched and coloured here and there with watercolour pencils. Add some tiny rusty bells or "grungy" buttons and you have a great collections of tree ornaments to adorn your Christmas tree.
Pattern.....$10AUD
ePattern.....$7AUD


Ooops! Thanks to my darling daughter who has no real interest in stitching, BUT, faithfully reads our blog every time. She noticed I hadn't attached the stitchery design for you so THANKYOU sweetheart! I hope no one missed out on it! Ü

Those of you who know Bronwyn's work will be interested in a little more insight into her life. She's been very kind and given us a lovely Christmas stitchery as well!!! Here is Bronwyn's story.
"My business is based in Canberra in the A.C.T.- home of the public servant, the Mint, the War Memorial, Questacon and the National Gallery to name but a few of the icons we've all come to Canberra to see either in the holidays or on school excursions.
That was also my first introduction to Canberra-
It was the move to Canberra
Having started a small graphic design business a couple of years before, providing graphics, signage and 3D displays to businesses where I lived- it wasn't until the move to Canberra brought me in contact with a business that needed graphics and designs for sewing and patterns, that I discovered the world of quilting and embroidery. And .. well.. it's just gone from there.
The business has grown over the years to include not only stitching, but quilts , bags, aprons, purses - you name it! Whatever I can think of. Usually featuring my signature Red Brolly Girls and Brutus the Cat designs.

Always work from the centre of the design you're stitching and stitch to one side first then the other. (Follow this rule for uneven shapes- but for oblongs or squares- start at one end of the shape and work across.)

1. Bring your needle to the front of the fabric at A, take it to the back at B and up again at A.
2. Work one side of the design in this way until you reach the end of the design.
3. Take the needle back to the centre again and work the other side of the design in the same manner.
Finish at the back with some tiny overlapping stitches to hold.

(A note from Jan&Cath...to print...right click on pic; save to computer then print)
If I'm not working in the business my favourite thing to do is read- magazines mainly as you can get a lot of information from them quickly. Or doing the gardening. Tending to my stunning array of weeds. After eleven years of drought- that's all that's survived.
In the next ten years I'm hoping to move the business more into graphics- that's the part I've always enjoyed doing- more cards and stationery items as well as the patterns and books. Hopefully! Like my favourite designers, Mary Engelbreit and Susan Wingett!"
Our thanks to Bronwyn for her story and she can be found at
www.red-brolly.com where there is a link to her blog and Facebook.Cath is showcasing her graphics this post.
 #1
#1 #2
#2 #3
#3This month I thought I would offer something different in the way of patterns. I have put my graphic printables up for sale........ These are sticky note holders. You print them out, laminate them and then using double sided tape, attach a sticky note pad where the space is. You can also add a magnetic strip to the back and attach the note book to the fridge.
These printables will be e mailed to you. They will be clean... which means my company name will not be across the picture. I have drawn and designed these printables and they are $3 each. Just remember to say which one you would like when buying... 1 2 or 3....... Or buy all three for $7.........
My super special item for this post is another printable........ This time we have a set of cute tags... All you have to do is print them out and laminate them. Then they are ready to attach to your favourite things...... They will also come to you as a clean set ready for you to print and will be e mailed to you.

These are on for the fantastic price of $2 for the set of 4 tags. Also anyone who buys all three note book holders and the tags will receive a free siggy tag...... It will be a cute Raggedy or Teddy with your name underneath and you can add them to the end of all your emails...... soooo cute........
This face is for a Raggedy and I have used the tear drop eye.

You will need Jo Sonja folk art paints. White, Black and a colour for the nose. If you want a red nose use Brow Madder.
Two paint brushes are used... a #3 round brush and a 5/0 liner or script brush.
This is an easy face to draw. Remember just like on the human face the eyes are in the centre of the face. If they are too high the face will not look as cute. On my patterns I draw the faces onto the doll head pattern. Once you have traced around the head of the doll you can take the fabric turn it to the other side and then place it back on top of the pattern. Make sure you line up the edges of the head and then using a light box you can trace the face in the correct position. When you use the light box it is easy to see where you have traced the head shape and easy to line it up with the paper pattern. Then you turn the fabric back to the side with the head shape drawn and sew around the head shape. Making sure that the fabric is double. If the head is one that is sewn all around and a slit cut in the back to turn it through, make sure that when you cut the slit that you don't cut the side you have traced the face onto. I paint my doll's faces after I have stuffed and sewn them together.
Using the #3 round brush and black paint fill in the eyes. Let the paint dry. Taking the liner brush and the white paint which you have thinned down a little with some water. Paint the white line down one side of each eye. Dot two small spots in each eye. Place them on the same sides, otherwise the doll may look a little cross eyed.
To paint the eye lashes, eye brows and mouth you use the liner brush and thinned down black paint. Practise on a scrap of fabric first. To use this brush successfully, you only paint with the tip of the bristles. If you lean the bristles over the line will become thick. We want to have hair thin lines.
Paint the nose in your chosen colour using the #3 round brush....... Take the liner brush and dip it in white paint and paint a line across the top of the nose.....
Dip the handle of the liner brush in the red paint and place a dot in the centre of the mouth.
Once the face is completely dry you can shade in the cheeks using a pastel pencil in a deep pink colour and shade around the eyes and across the nose with a light brown pastel pencil. I like to blend these into the fabric using a cotton bud.....
Your doll is now ready to admire.......
Now for Jans pattern showcase.....All for Christmas!

Christmas Tradition...... The legend of the candy cane tells that the holiday treat was first created to bring the true meaning of christmas back to the festive season. The candy cane is believed to represent the letter "J" for Jesus. Other legends state that the first candy canes had two red stripes and a white, representing the Holy Trinity. Keep with the tradition and create your own!
Pattern.......$10AUD
ePattern......$7AUD

Christmas Tree Hangers......Cute little stitcheries stitched and coloured here and there with watercolour pencils. Add some tiny rusty bells or "grungy" buttons and you have a great collections of tree ornaments to adorn your Christmas tree.
Pattern.....$10AUD
ePattern.....$7AUD

Christmas Years..... Each year I make a Christmas pillow to celebrate the season. They add a great touch to your decorating. Tumble them into an interesting cane basket and start your own tradition by adding one each year. Made with various cotton fabrics, flannels, as well as my favourite - felted wool.
Pattern.....$10AUD
ePattern.....$7AUD

Christmas Carol is my special for this post. My Christmas take on the old fashioned what-nots. Stitch the words from three carols matching their shape and mount them on a simple wooden base.
ePattern only.....$5AUD
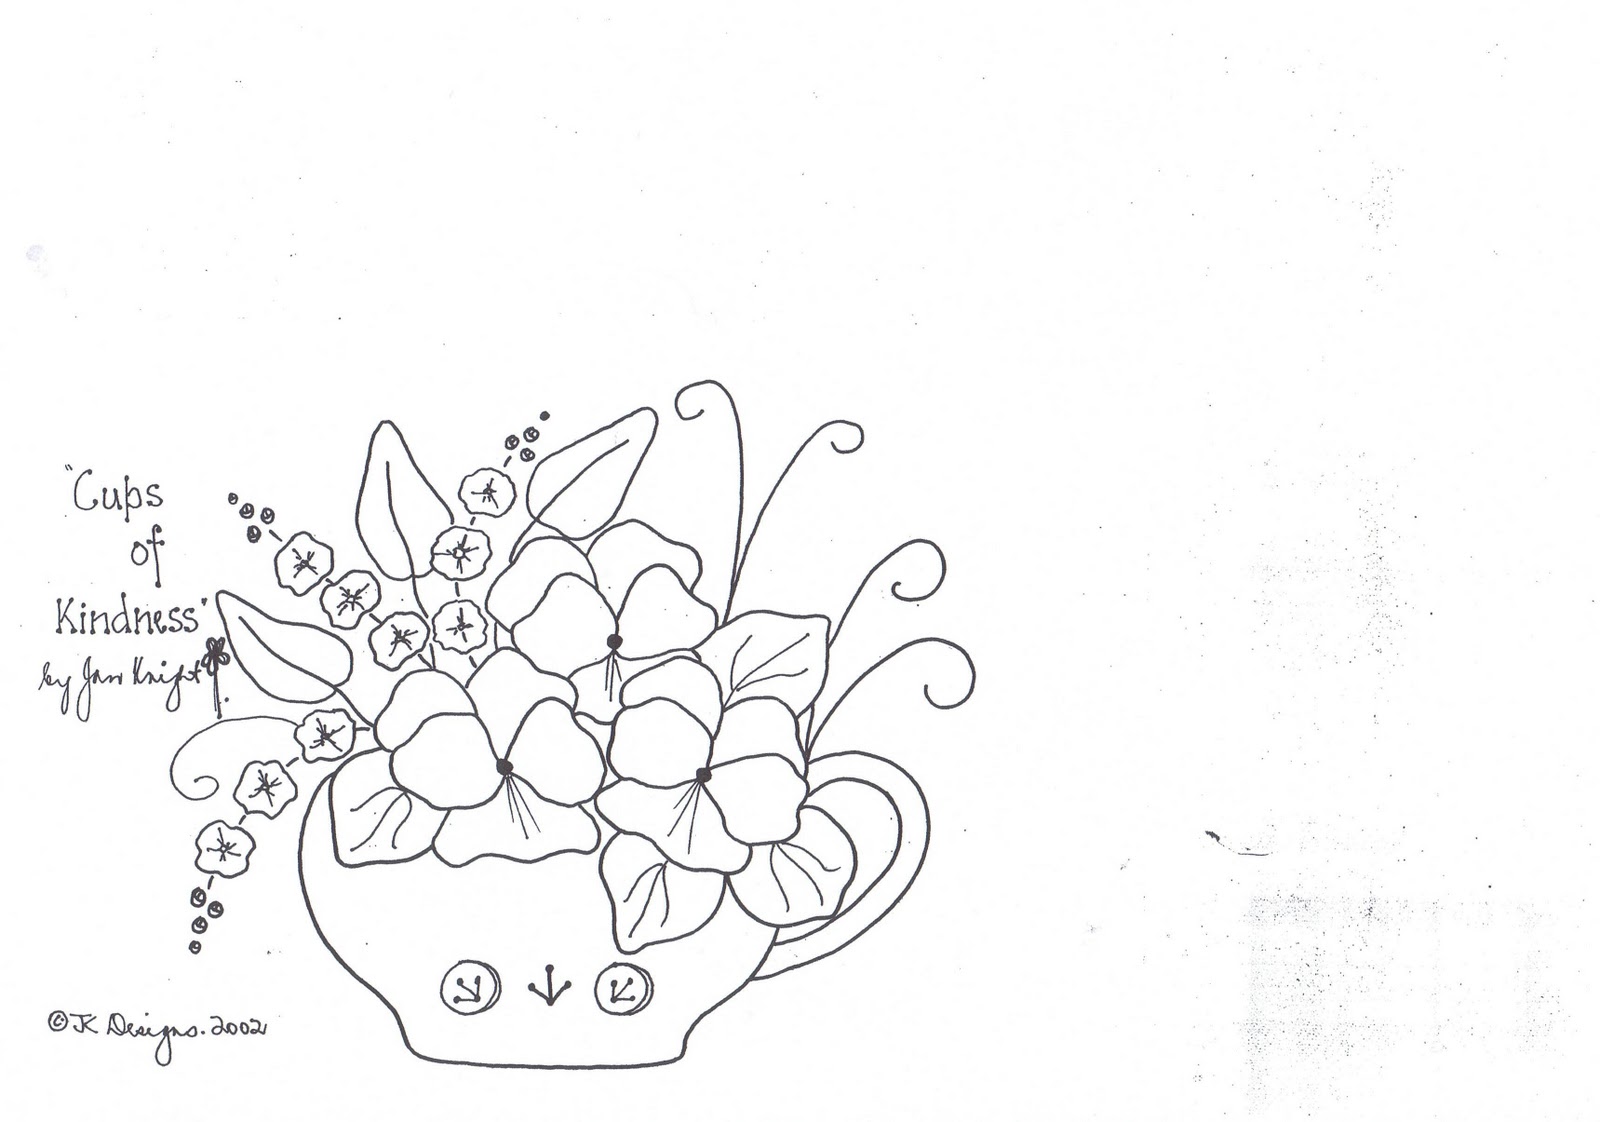
Now a free stitchery for you. The first of five that will be featured on our blog over a period of time. Cups of Kindness is a collection of teacups filled with flowers for you to stitch, either in colour or it also looks super stitched in red or blue. Do the usual, right click, save to your computer and print but if you have trouble email me on ozjan51@hotmail.com and I will send it to you.

Ooops! Thanks to my darling daughter who has no real interest in stitching, BUT, faithfully reads our blog every time. She noticed I hadn't attached the stitchery design for you so THANKYOU sweetheart! I hope no one missed out on it! Ü
That's it for this post! Hope you have enjoyed reading about Bronwyn, use Cath's tutorial to paint some interesting faces and enjoy stitching Cups of Kindness. Until next month, happy stitching from,
Wednesday, September 21, 2011
SPRING HAS SPRUNG!
Spring in our area of the world has definately been and nearly gone. Warm, warm days but, sadly, a lot of bushfires surrounding us and the skies have been full of smoke. We could certainly do with a little rain. I see that the east coast of the USA are having floods so, no matter where you live in the world, mother nature is giving us a hard time!
On to good things Ü. We have the third block in the Pretty Posies BOM for you as well as a lovely little stitchery from Cath. Our usual showcase of patterns as well. Cath also apologises for not giving the painting instructions for her cute faces this post but will have it ready for the next one.
Cath is feeling very much "under the weather" this week with a bad dose of the flu and as we're both very busy ladies we have made the decision to post once a month (around the 15th of each month) rather than each fortnight. We're disappointed to have to do this but it's the only way we can do everything that we have to. We're sure you all will understand.
This post our Guest Crafter is ME! Ü Felt a little strange asking myself the questions LOL but here we go.
I live in a small village called Forest Hill which is just off the Warrego Highway between Brisbane and Toowoomba, in the wonderful state of Queensland. Mum taught me to embroider when I was about 8 and to crochet when I was around 13. They were what I did for many years. I took a patchwork/quilting course in 1983. That was when “the rot” set-in! This became my passion and still is although I have stretched out into other areas as well. The designing started around about 1992 when I was teaching regularly and felt it wasn’t right to teach other people’s designs/patterns etc. It was in 1998 when I released my first pattern and in 1999 had my first project published in Australian Patchwork & Quilting magazine.
What do I create?... Anything that needs a needle and thread. Lots of projects utilising appliqué and embroidery mostly but some piecing as well. That’s what I mainly do for the magazines but I also adore crazy patch, creative embroidery and handmade artist books when time allows me. If you would like to see what else I do, go visit http://jansdesigns-jan.blogspot.com/
A tip I might like to share? … I’m probably preaching to the converted BUT, always try to, at least, stitch on something for 20 minutes (or more) each day. It will amaze you how much you get done if you do! Also, because I’m a hand stitching girl, if you are ever hand stitching with a sewing thread ALWAYS thread the needle and then cut. A shortish length is necessary to stop knots and twisting.
My favourite recipe? I'm not a great cook and probably have way too many favourite recipes but I thought I would with you my favourite flower? I tend to change from Pansies to Wisteria depending on which one I see first! LOL We visited my husband's aunt last weekend and she's a great gardener as well as being a florist. Her wisteria vine was out in flower and I just had to take a photograph.

Because we have lived in government or rental homes all of our married life and because of Ross's job (lots of transfers!) we've been able to plant one so I'm desperately waiting for him to retire (well not TOO soon! lol) so we can plant one.
Your favourite pastime other than crafting? Music and reading would have to be my answer. I also love going to the theatre whenever I can and whilst I love flowers etc I'm not a gardener but certainly appreciate everything Ross does in the garden. Thank goodness he has a green thumb!
What do you see yourself doing in ten years time? … Hopefully exactly what I’m doing now but I’ll be 71 so maybe I might have slowed down a bit! Ü
Who is your favourite designer? Has to be Australian Bronwyn Hayes – just love what Bronwyn does and have a large collection of her patterns to stitch when I retire! LOL She is very creative and also very sharing. American, I love what Sue Spargo designs - her marrying of fabric, felted wool and embroidery embellishing is just stunning.
Pretty Posies BOM

Email Jan for the pattern and instructions Ü
Here is Cath's free stitchery...two cute little raggedy angels.
 Cath's showcase patterns for this post are

Annie and Kitty

Little Raggedie & Mini Quilt


On to good things Ü. We have the third block in the Pretty Posies BOM for you as well as a lovely little stitchery from Cath. Our usual showcase of patterns as well. Cath also apologises for not giving the painting instructions for her cute faces this post but will have it ready for the next one.
Cath is feeling very much "under the weather" this week with a bad dose of the flu and as we're both very busy ladies we have made the decision to post once a month (around the 15th of each month) rather than each fortnight. We're disappointed to have to do this but it's the only way we can do everything that we have to. We're sure you all will understand.
This post our Guest Crafter is ME! Ü Felt a little strange asking myself the questions LOL but here we go.
I live in a small village called Forest Hill which is just off the Warrego Highway between Brisbane and Toowoomba, in the wonderful state of Queensland. Mum taught me to embroider when I was about 8 and to crochet when I was around 13. They were what I did for many years. I took a patchwork/quilting course in 1983. That was when “the rot” set-in! This became my passion and still is although I have stretched out into other areas as well. The designing started around about 1992 when I was teaching regularly and felt it wasn’t right to teach other people’s designs/patterns etc. It was in 1998 when I released my first pattern and in 1999 had my first project published in Australian Patchwork & Quilting magazine.
What do I create?... Anything that needs a needle and thread. Lots of projects utilising appliqué and embroidery mostly but some piecing as well. That’s what I mainly do for the magazines but I also adore crazy patch, creative embroidery and handmade artist books when time allows me. If you would like to see what else I do, go visit http://jansdesigns-jan.blogspot.com/
A tip I might like to share? … I’m probably preaching to the converted BUT, always try to, at least, stitch on something for 20 minutes (or more) each day. It will amaze you how much you get done if you do! Also, because I’m a hand stitching girl, if you are ever hand stitching with a sewing thread ALWAYS thread the needle and then cut. A shortish length is necessary to stop knots and twisting.
My favourite recipe? I'm not a great cook and probably have way too many favourite recipes but I thought I would with you my favourite flower? I tend to change from Pansies to Wisteria depending on which one I see first! LOL We visited my husband's aunt last weekend and she's a great gardener as well as being a florist. Her wisteria vine was out in flower and I just had to take a photograph.

Because we have lived in government or rental homes all of our married life and because of Ross's job (lots of transfers!) we've been able to plant one so I'm desperately waiting for him to retire (well not TOO soon! lol) so we can plant one.
Your favourite pastime other than crafting? Music and reading would have to be my answer. I also love going to the theatre whenever I can and whilst I love flowers etc I'm not a gardener but certainly appreciate everything Ross does in the garden. Thank goodness he has a green thumb!
What do you see yourself doing in ten years time? … Hopefully exactly what I’m doing now but I’ll be 71 so maybe I might have slowed down a bit! Ü
Who is your favourite designer? Has to be Australian Bronwyn Hayes – just love what Bronwyn does and have a large collection of her patterns to stitch when I retire! LOL She is very creative and also very sharing. American, I love what Sue Spargo designs - her marrying of fabric, felted wool and embroidery embellishing is just stunning.
Pretty Posies BOM

Email Jan for the pattern and instructions Ü
Here is Cath's free stitchery...two cute little raggedy angels.

Annie and Kitty
This is a
cute prim pattern of a baby Annie and her Kitty. Both are wearing nappies. They
are very easy to make and you won't want to stop at making only one
set.
$12 Hard
copy... includes postage.
$7 E
Pattern......
This cute
little Raggedy comes with her mini quilt. There is a cute little stitchery of
her in the centre, appliqué hearts and some very easy strip piecing.
$12 Hard
copy... includes postage.
$7 E
Pattern.....

Raggedy Wall Hanging
This wall
hanging has a large Annie head and a large Andy head on it. Easy patchwork and
looks lovely done in any colour way. The appliqué is very easy and suitable for
a beginner.
$12 Hard
copy... includes postage.
$7 E
Pattern......

Here we
have 4 very cute Raggedy note papers. I have designed these myself and they are
my special offering for this post. You will be sent a clean copy and then you
can print off as many as you like.
$2 .....
Christmas and Bags are my showcase offerings for this post.

Country Carpet Bag
My interpretation of the "Mary Poppins" bag. I used wool pieces for the bag and felted wool scraps for the applique. The ladybird is one of my handmade wooden buttons but the bag would look fantastic made from tapestry fabric bits or even denim! Velvet would look great too....I really need to make more! Ü
$12.00 AUD OR
$7.00 AUD for an Epattern...

Holly Season Tablerunner
Just perfect for your Christmas decorating!
$12.00AUD OR
$7.00AUD for an Epattern ...

MANHATTEN
Classy bag with a zippered closure. Perfect for a day out shopping. Works well in any fabric choice.
$12.00AUD OR
$7.00AUD for an Epattern...

Felt Baubles
This post's special is my collection of felt baubles for your Christmas tree. A quick and easy project and fun to make!
$5.00AUD for Epattern only.
There we go! Hope you enjoy the patterns and the freebies and we'll be back around the 15th October. I've just previewed the post and the font seems all higgeldy piggeldy and I'm not sure why! lol Apologies for that but Happy stitching until then!
Tuesday, September 6, 2011
SPRING IS HERE!!!
Spring has arrived in the valley and the days have been so beautiful! Those of you in the northern hemisphere will be preparing for all the beautiful colours of autumn. This time of year, for us, is full of quilt shows and spring flower festivals....lots of fun!!
Our Guest Crafter for this post is Nicki Tervo from Brisbane. Many of you will have seen Nicki's ceramic buttons at lots of quilt and craft shows. You can take a peek at her great range on
1. web: www.handcraftedbuttons.com.au
2. blog: www.nikkitervodesigns.blogspot.com
3. facebook: Nikki Tervo
Nikki also has a range of patterns under the Brandy Gully umbrella. When asked how she got started Nikki replied; "A potter by trade, I then had an industrial accident so took up making buttons to trade for fabric as I had just taken up quilting as a hobby. My Gran lent me some money so I could buy a kiln and it all went from there. That was 16 years ago…… (suddenly I feel old)" Don't we all Nikki!
'"Ceramic buttons are what I am best known for but I love designing small easy projects that can be finished easily by any level of crafter. The patterns have buttons on most of them but not all of them. They are a real cross section of patterns as I love to make different things myself" was Nikki's reply when we asked her what she created.
Nikki's tip to share with us? "Never unpick your work as that is like unpicking your history. No matter how bad you think it is or how much some one else’s is better, right now this is the best you can be and you will get to see yourself improve and have the proof to show others just starting out. Always share your knowledge freely and happily." Wise words!!
Nikki's favourite recipe is a yummy one! Coconut Ice. Makes 12 large bars. Into a saucepan put 6 cups of sugar and 1 ½ cups of milk. Bring it to the boil while stirring constantly with a wooden spoon. Boil for 5 minutes on low. Add 2 ¼ cups of coconut, and boil for one minute more. Take off the heat and beat with an electric beater until very thick and creamy and ‘wave type ridges’ form in the mix. Using a shallow 1” deep by 12” long and 6” wide tray, wet the inside of the tray with some water and then pour out the excess water but don’t dry the tray. Pour half the mix (and it will till be hot as you have to have tray ready and work fast) into the tray and smooth across the bottom of the tray. Then using a pink food colouring, colour the rest of the mix in the saucepan with your wooden spoon until all one even satisfactory colour (too much colouring makes it look odd, you need it to be a lovely pink not a bright hot pink) Spread this mix over the top of the white mix in the tray and smooth out. Then use a wet knife while the mix is still warm and cut the mix through. Cut it into whatever sizes you choose, Keep wetting the knife as you go. Once all the cuts are in, then put in fridge until set and cold. Flip out of tin and the knife cuts should allow you to break it into the pieces with ease. This is a great lollie for school fetes etc. (For those of you who live outside Australia a "lollie" is a sweet or confectionary Ü)
When not crafting Nikki loves to spend time in the rainforest, gardening, spending time with husband and family and definitely drinking cups of tea and eating sticky buns with friends!
We asked Nikki what she thinks she will be doing in 10 years time: "Not sure at this stage. Still sewing and as clay makes my soul sing, no doubt I will still be making buttons. The kids will be at the age of having kids, so that brings in a whole lot of new adventures. John wants to tour around Australia in a campervan so he is madly trying to design a sewing room that will ‘work’ so that I will travel with him. LOL"
Our final question to Nikki was does she have a favourite designer: "Don’t really have one. I love to make lots of things and lots of quilts. I love making dolls, but they usually do my head in. LOL I love making useful things and I love making really complicated quilts as well as really easy ones. So I guess I love every ones things but don’t ever stick to one set designer." Thanks to Nikki for being our guest designer this post.
It's time for Cath's Teddy BOM this post and we're sure you will enjoy stitching him!
Cath's patterns for showcase are listed below.


Beach Babe.
This Raggedy is fun to make. She is free standing and has bare feet. Also included in the pattern is her swim ring and her pull along duck. This doll can be made by a novice doll maker. A real cutie.

Lady Bug Annie.

This is one of my favourite patterns to make. Annie is once again free standing. This is easy to achieve and full instructions are in the pattern. Both dolls wear shoes. Annie is wearing toddler shoes and Chooky is wearing doll shoes. Chooky also has her favourite toy with her... a pull along chook.....
e pattern only...... $5
Teddie BOM #2

Also e mail me for the instructions to stitch this Teddy. Please take note I will be away from Friday9th until Sunday the 18th.If you have ever seen Cath's cute, cute, CUTE faces on her Raggedies you will love her free tutorial this posting. Here 'tis!


Our lucky follower to comment for last post is Deb from Maine! Email me Deb and I'll organise your prize! Ü
We hope you have enjoyed your "read" and always let us know if there's anything special you would like us to write about. One of our followers has asked for some info on what can be done with the wonderful embellishing machines available now. I'm working on a tutorial for that so keep your "eye" out for it!
Until next time......Happy Stitching,

Our Guest Crafter for this post is Nicki Tervo from Brisbane. Many of you will have seen Nicki's ceramic buttons at lots of quilt and craft shows. You can take a peek at her great range on
1. web: www.handcraftedbuttons.com.au
2. blog: www.nikkitervodesigns.blogspot.com
3. facebook: Nikki Tervo
Nikki also has a range of patterns under the Brandy Gully umbrella. When asked how she got started Nikki replied; "A potter by trade, I then had an industrial accident so took up making buttons to trade for fabric as I had just taken up quilting as a hobby. My Gran lent me some money so I could buy a kiln and it all went from there. That was 16 years ago…… (suddenly I feel old)" Don't we all Nikki!
It's time for Cath's Teddy BOM this post and we're sure you will enjoy stitching him!
Cath's patterns for showcase are listed below.
My latest Pattern is the Raggedy Twins... They are very easy to make and look lovely sitting together on your shelf. They are small dolls, but cute. Full face painting instructions are in the pattern.
Hard copy $12... including postage.
e pattern $7This Raggedy is fun to make. She is free standing and has bare feet. Also included in the pattern is her swim ring and her pull along duck. This doll can be made by a novice doll maker. A real cutie.
Hard copy $12... including postage.
e pattern $7Another small but cute Raggedy. This time she has her pet lady bug with her. Full face painting instructions are included. Easy to make and you won't want to stop at only making one.
Hard copy $12... including postage.
e pattern $7
Cath's Special
Annie & Chooky.
e pattern only...... $5
Teddie BOM #2

A note from Cath,
This is the second block of the Teddy Swag. You make it exactly the same way as the first one is made. So please e mail me for instructions to block one if you do not have them already.
Also e mail me for the instructions to stitch this Teddy. Please take note I will be away from Friday9th until Sunday the 18th.

Here are three cute and easy Raggedy faces to paint onto your dolls. Just enlarge them before you print them off to suit the size of the doll's head. Most printers have an enlarge button.
To trace the face onto the doll you need to trace around the head shape on your chosen fabric. Then place the page with the faces on it on the light box. Place your head fabric on top of this with the drawn side down facing the paper. You will be able to see the outline of the head through the fabric, because of the light. Line the head up with the face and then trace the facial features onto the fabric.
When you have done this, you will turn the fabric over and sew on the drawn line , making sure you have double fabric. When you cut out the doll and turn it the right way out, the facial features will be in place on the head.
Use a sharp lead pencil to trace with. A soft lead will work better. 4B is a good one. Make sure that the eyes are half way down the head, as this is where our eyes are on our faces. If you place the eyes higher than the halfway mark, you tend to get a face that isn't as cute looking. Stuff the doll really well as this makes it easier to paint the face on.
I will give painting instructions in our next post.
Jan's patterns for this post are another combination...
Christmas Messages
Be ready in time for Christmas! Christmas Messages are quick and easy to finish and look great in your entryway or a great gift for family and friends.
Hard copy $12...(includes P&H)
e pattern $7
Birdhouses & Beehives Banner
Another in my banner series. This time an extra stitchery and small wall hanging.
Hard Copy $12... (includes P&H)
e pattern $7
Country Patch Bag
This has been a very popular bag and was also published in Country Threads magazine. A great size for that day out and would work in any fabric choice and you could also make it with denim and even leave the applique off the front!
Hard copy $12..... (includes P&H)
e pattern $7
My special for this posting is my Friendship Tote. A combination of stitcheries and lovely Aunt Grace fabrics. The ruffles make it even prettier and the handles even have stitching on them too! Looks good in any range of fabric though!
e pattern $5
My free stitcherie for this post is two for the price of one! Ü

e pattern $5
My free stitcherie for this post is two for the price of one! Ü
Our lucky follower to comment for last post is Deb from Maine! Email me Deb and I'll organise your prize! Ü
We hope you have enjoyed your "read" and always let us know if there's anything special you would like us to write about. One of our followers has asked for some info on what can be done with the wonderful embellishing machines available now. I'm working on a tutorial for that so keep your "eye" out for it!
Until next time......Happy Stitching,

Subscribe to:
Posts (Atom)