We've both been busy with designing new projects and keeping up with the wonderful response from everyone to our new blog. Thanks to all of you for your kind wishes and your fabulous response to our patterns etc. We've come up with some new ones for you this posting so, hope your "nimble fingers" are itching for more!!!
Cath has been busy and has completed the bag featuring the Raggedy stitchery from last post.


Our guest crafter this post is Jenny Reynolds of www.elefantz.com. Jenny calls
We asked her how she got started on her delightful road to “Elefantz” and she replied, thus “My husband was a motor mechanic with wrist problems after a youthful motor bike accident, so he retrained at University to become a high school teacher. His first teaching position was a 6-month stint in Armidale, NSW, in 2005. We were living in Wagga at the time and weren’t sure what would happen after the 6 months in Armidale so we had a monster garage sale and put what was left in storage. We moved to Armidale with only as much stuff as we could fit in our Commodore, plus our two kids! The only housing option we had was a small cabin at the local caravan park – middle of winter in Armidale is ICY!! – between chipping ice off the inside walls of the cabin and waiting till mid-morning for the taps to thaw so we could have showers, I continued to homeschool our kids. We met up with a local homeschool family and one of the teenage daughters showed me her patchwork items. I was so hungry for something to do with my hands, as life in the caravan park was quite lonely after my lessons with the kids were done and my husband was off teaching each day, so she encouraged me to take home some of her craft magazines and have a go. That was September 2005, and I have not looked back!” Jenny’s story sounds so familiar doesn’t it?
What do you create? We asked and her reply was simple. “I focus mainly on stitchery and applique, and then incorporate them into projects. Twice a year I design a quilt using my signature Shabby Roses designs, and I think they express the real heart of my style.”
Jenny’s best tip rings true to most of us we feel - “Trust yourself to change what someone else has designed. When I first began this craft I would make projects exactly like the photo in the magazine – same colours and if I could find them I would even use the same fabric. One day in 2008 I thought to myself, “Why are you remaking someone else’s designs? Why don’t you think outside the box and trust your own colour combinations and tweak things?” So I did. After that it was only a matter of months before I began designing my own projects from scratch – the results really surprised me, but I learnt a lesson about looking inside me and being brave enough to put it on paper and then into fabric and thread. I believe we all have an individual creative voice – we just need to let it out.”
“Lemon Tart” is Jenny’s favourite recipe; she tells us it is an Elefantz favourite. Email Jan and she will send you the recipe.
When Jenny is not designing for “Elefantz” her favourite pastime is "Riding pillion on my husband’s motorbikes! We travel far and wide on the bikes, seeing places I never imagined visiting. It’s been the most amazing thing for us now that the kids are finishing schooling and have jobs and lives of their own. Every weekend we’re off somewhere, and as my hubby is a teacher we also do longer trips each school term break. It’s the perfect balance to my normal weekly ‘inside life’ of design and sewing.
Jenny replied “No idea. Life is an open door to so many possibilities and I want to explore them all. I’m pretty sure I’ll still have a bike helmet in one hand and a needle and thread in the other, though!” to our question of what she will be doing in 10 years time.
We asked Jenny who her favourite designer is and she replied very promptly; “I don’t have one as such. I love designers who are quirky and always changing – women like Anna Maria Horner and Sarah Fielke – plus others who speak to that olde world girl in me, such as Caroline Zoob and Jane Brocket. I am also inspired by Rachel Ashwell’s soft and carefree style.
Above all I look at Creation because God’s hand painted canvas of Earth inspires me more than anyone and anything.”
You can also keep up with Jenny’s creativity by following her on
http://www.facebook.com/pages/Jenny-of-Elefantz/195420573847095
*******
Circle Flowers......

These cute flowers are very easy to make and you can use them for decoration on a multitude of things.
I learnt how to make this flower years ago at a class. I have just adapted it to what I think is a really easy flower to make.
Thread a needle with good quality sewing thread. Take a petal and fold it in half with the wrong sides together. Sew a row of running stitch around the raw semi circle edge. Gather it in as tight as you can, secure, but do not cut the thread. Take your next petal and repeat the procedure, using the same needle and thread. Continue until you have sewn all five petals together. Secure them into a circle. Cut the thread.
Take a button large enough to cover the hole in the middle of the flower. Cut a piece of pellon large enough to cover the top of the button. Next you cut a circle of dark fabric large enough to cover the button, with enough fabric to cover over onto the back of the button. You cover the button by sewing a row of gathering stitches around the circle, pulling in a little, then place the pellon circle and button inside the circle. Pull the gathering thread tight and secure the fabric over the button.
Place the button on top of the hole in the middle of the flower and neatly sew the outer edge of the covered button to the petals.
You now have a cute flower that you can attach to your doll as a hair clip, you can wear it as a brooch, you can embellish bags etc with one as well......
*******
Jan's free pattern for this post is a folksy little Christmas Tree that can be used for anything you might like.

Email Jan for the pattern. Here it is stitched and buttons added. I made it into a Christmas pillow to add to my collection.

*******


Jan's "Country Chookz" Banner...just one of a large range of banners/swags. These have been very popular as the patterns can also be turned into a quilt if you choose.
All patterns are $12.00 AUD (P&H Incl) each for a paper pattern or $8 AUD for an ePattern.

Jan's special for this posting is "Blast from the Past" - two handy pouches for whatever you choose. Both pouches feature Jan's love of ric-rac and buttons.
Epattern only for $5.00 AUD
*******
Cath's showcase features a brand new release this post.

Here is the "sneak peek" at Cath's brand new "Raggedy Twins"...pattern will be available next post!

T Cup Raggedies...... These cute little Raggedies are very easy to make. Face painting instructions are included in the pattern. Plus as a bonus you get to keep that favourite cup and saucer that may have a chip or crack in it. They can also be used as a pin cushion.
Paper pattern....... $12 AUD including postage.
E Pattern.....$7

Raggedy Cushion........ Very easy to make and has the cutest Raggedy stitchery.
Paper pattern....... $12 AUD including postage.
E Pattern.....$7

Stitching Tote: This is a fantastic way to store your Cottage garden threads, as they are cut to size when you purchase them. The tote has pockets to store your bits and pieces in, plus there is a section to hold your scissors & your thimble. The tote also has a needle book and a pincushion.
Paper pattern....... $12 AUD including postage.
E Pattern.....$7
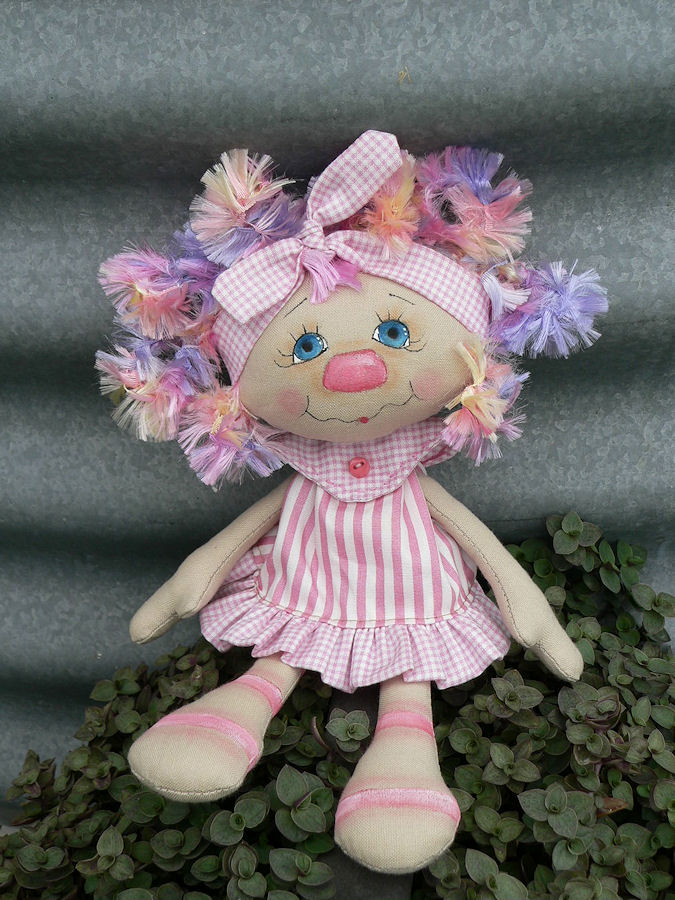
Cath's Special for this post is "Charli Anne" Charli Anne is one of the smallest Raggedies I have designed and my favourite. Included in the pattern is the instructions to crochet her hair. Face painting details are also included. She is a little sweetie and you will love making her....
E Pattern....... $5
*******


Hi Jan
ReplyDeleteI'm a friend of Cath's. I love the blog that you and Cath are doing. I have just printed out your Christmas Tree. I'm hoping to do it over that weekend. Keep up the great work. Also love the pockets and the banner. Might just have to get them.
Oops forgot to say Cath love your new dolls. They turned out great.
ReplyDeleteWhat a wonderful post! such a lot to READ and look at and enjoy!
ReplyDeleteI liked in particular the bit about having the confidence to go outside of sticking JUST with the pattern - this has always been MY problem - becoming braver at making my own impression1
love the xmas stuff! esp. the "pockets" and the tree stitchery is GORGEOUS! the dolls are FAB too and the detail and QUALITY in all shows through!
super blog post!
Sue xx
Our funny little Kansas Butterfly.. I am sew glad she won!
ReplyDeleteSuch a talented pair of ladies, Jan and Cath! I am enjoying your blog.
Hugs <3 Deb
I WON?
ReplyDeleteI WON I WON! ! !
THANK YOU THANK YOU
No link for the Circle Flowers tutorial?
ReplyDeleteLove those dolls.
I found you following the interview link from Jenny of ELEFANTZ. So glad I did!! I love the dolls, especially "Charli Anne". Have a wonderful day!! Jennifer
ReplyDeletelike I need more eye candy projects on my list..I mus tbe strong I must be strong..awesome projects girls,cheers Vickie
ReplyDeleteGreat projects, look forward to watching this blog.
ReplyDeleteHelen